In this tutorial we'll be going over the different lighting options that can be found in the editor. We will be using the maps created in the Interior and Exterior map tutorials as our examples here. The following will be covered in this tutorial
- Setting Up Camera Regions
- Ambient Light
- Directional Light
- Point Lights
Creating a Camera Region[ | ]
Camera Regions are a special kind of Region. When a Camera Region is active, the camera is locked within that region for the player. This is great for dictating how far off a player can look on a map and avoid scrolling into the black void. In order to make one we will first create a new Region from the Scene Contents view. Then modify its type.
- Right-Click Regions -> Select
 New Region
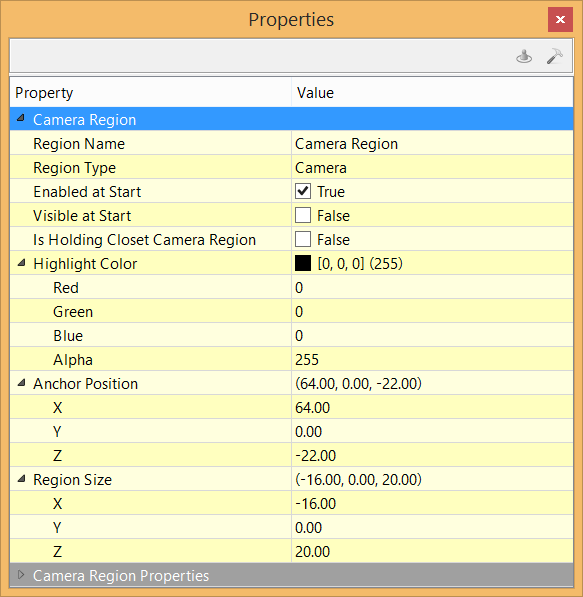
 - With the Region selected, set its name in the Properties View (e.g. c01_s01_CameraRegion)
- Set the Regions Type to Camera
- A new Properties Table will appear for the Camera Region
- Drag the Camera Region Indicators into place so that it covers your map
Once the Region has been declared a Camera Region, you will notice the Region indicator will change from Purple with a Gear Icon to Light Blue with a Camera Icon.
Ambient Light[ | ]
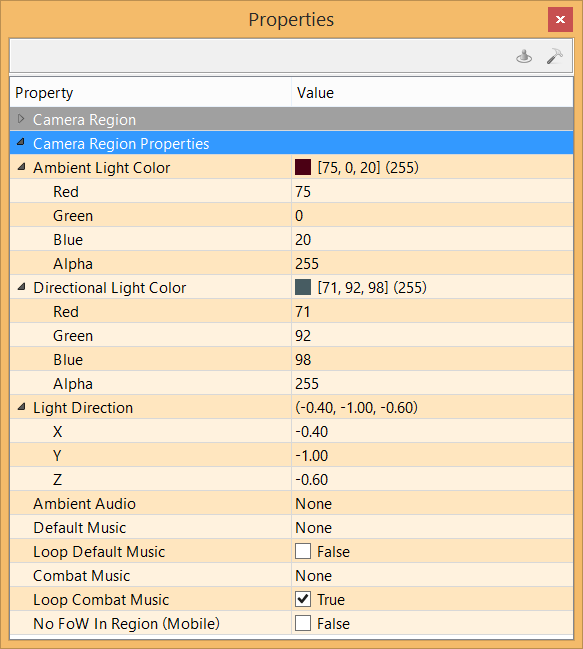
The Ambient Light property is used to dictate the shadows and base light of a region. By default a new Camera Region will have this preset to [128,128,128](255). The color code follows the standard RGBA( Red, Green, Blue, Alpha Channel) format with a min-max of 0-255.
- Open the Color Picker by clicking (Insert Browse Icon)
- Select a Color with the Color Picker or input a RGBA value (e.g Dark Green (54,78,35,128)
This will be the color assets will assume when no other lights are interacting with them. By default you already have a Directional Light in place, but you can remove this to test your ambient light by setting its values to (0,0,0,0) creating a "Black" Directional Light.
(Insert Image Default Lighting, Green With Default Directional, Green without Directional)
Directional Light[ | ]
The Directional Light property acts as a global light source for your Region. It has a preset value of (128,128,128,255) and is affected by the Light Direction property which defaults to (-0.50,-1.00,-0.75). Playing with these values can really change the ambiance of a scene and the harshness of shadows. Generally you will be using a color that is lighter than your Ambient Light.
- Open the Color Picker by clicking (Insert Browse Icon)
- Select a Color with the Color Picker or input a RGBA value (e.g Light Purple (184,156,184,255)
(Insert Image Directional Light Color/Angle)
Point Light[ | ]
With the Ambient Lighting and Directional Light in place, it is time to add Point Lights. A Point Light is an asset that can be placed in the Scene to customize lighting. These are best used in reference to other assets found in your scene. (e.g. Lights, Monitors, Street Lamps, etc.) Without a implied source, Point Lights work well to signify ceiling lights for interiors or out of view street lamps for exteriors. When selected the Point Light property table will appear in the Property View. Here you can set the Light Color, Light Radius, and Light Intensity.
Below is an example of how we laid out the lights in the Lab Scene.Notice how the lights are paired up to the monitors and other light sources. Experiment with the Point Light settings to create the type of effect you are looking for.
(Insert Image Point Light properties)
(Insert Image Sample Light Layout In Editor / In Game)
Filler[ | ]
You may have noticed in the examples that some of the outer walls are showing. Like the fill walls used in the Interior tutorial, there is a Fill Tile that can be used to cleanup these left overs. The Fill Tiles comes in a 2x2 and a 4x4 tile. Drag these into your scene to cover any walls that are not intended to be visible.
(Insert Image Fill Tiles In Use)